Record Status Management
- 07 Nov 2023
- 1 Minute to read
- Print
- DarkLight
Record Status Management
- Updated on 07 Nov 2023
- 1 Minute to read
- Print
- DarkLight
Article Summary
Share feedback
Thanks for sharing your feedback!
Record Status Management
Master Reference Data Management: Contract Status
Contract Insight supports the ability to track contracts by contract status. For example, a Contract Status may be Open, Closed, Canceled, Renewed, Pending, etc. The Contract Status list can be managed by the Application Administrator.
To Add a Contract Status
1. Select Contract Status from the Manage/Setup top navigation menu item.

2. This will open the List Manager screen listing all of the contract statuses already in Contract Insight.
3. Click Add Record on the side menu.
4. Enter the name of the new contract status and click Save.
To View/Edit a Contract Status
1. Click View for the contract status line item to view/edit.
2. This will open the Status List Configuration screen.
3. To edit the name of the contract status, click the Pencil Icon for the Status Name line item.
4. Edit the text for the name of the status and click Save Changes.
To Delete a Contract Status:
Note: Prior to deleting a status, make sure it is not being used by any contract records.
1. Go to the Status List Configuration screen for the line item to delete.
2. Click Delete on the side menu.
3. Confirm the deletion.
To Set a Status to Not Allow Email
Users have the option to set a Contract Record to a Status that will not send out email alerts.
Note: this should only be used for contracts that alerts are not required (i.e. Expired, Terminated).
1. Go to the Status List Manager screen. If the Allow E-mail column is not visible, it can be added by using the Manage Columns link on the side menu..png)
2. Click View for the Status for which to set the Allow-Email to False/No. Note that all Statuses, by default, are set to True/Yes..png) 3. This will open the Status List Configuration screen. Click the Pencil Icon to edit the Allow Email item.
3. This will open the Status List Configuration screen. Click the Pencil Icon to edit the Allow Email item. 4. Set Allow Email to False/No to no longer have the regular system generated e-mail alerts sent out for the contract record when the Contract Record is set to this status.
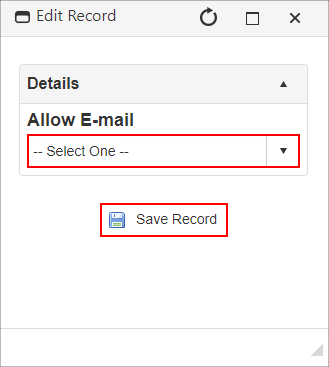
Manage Columns Button:
Note: The Manage Columns button will allow users to view additional columns of information available for the table selected.
1. Click Manage Columns on the side menu.
2. On the next screen select the field to view as a column. Click the Add button next to the desired field to move the item to the left-hand column..png) 3. Once added, click Back to List on the side menu. The column just added displays.
3. Once added, click Back to List on the side menu. The column just added displays.

Was this article helpful?